If you want to start growing fresh vegetables at home, few options are as straightforward or cost-effective as bean sprouts. Most commonly grown from mung beans, bean sprouts do not require long growing periods or complex methods for getting beans to germinate. Continue reading to learn how to grow bean sprouts.
Although it is possible to grow chickpea and alfalfa sprouts, mung beans are the easiest. Like chickpeas, mung beans are the seeds of plants within the legume family.
Mung beans make great replacements for other common legumes or lentils in many recipes. Bean sprouts are heavily cultivated in Asian countries but are well-liked worldwide and common in sandwiches and stir-fry dishes.
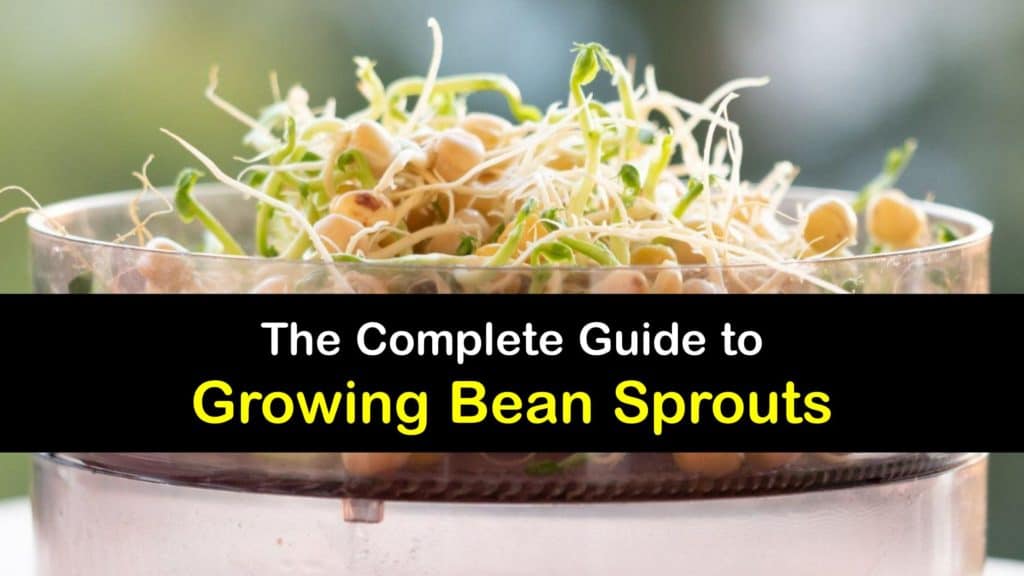
Growing Bean Sprouts
Because of their popularity and nutritional value, it’s not hard to find sprouts at the store. However, growing mung bean sprouts at home is the tastier option over sprouts purchased from the grocery store. With a few simple kitchen items and knowledge of how to safely grow, store, and prepare sprouts, you’ll never be without a supply of these delicious sprouts again.
Because of their growth pattern, the best methods for growing sprouts involve water, a jar, or a colander with straining material, unlike when you plant cilantro seeds inside with soil and a pot or grow mushrooms at home inside with a special growing medium. This article covers the bean sprouting process and what items are needed for the type of sprouts you grow.
The Germination Process
The type of bean and size determines the length of time it takes beans to sprout, but a general rule of thumb is one week in the right conditions to grow sprouts.
Sprouting beans is simple enough to be completed at home, but large-scale manufacturers complete the process on an industry level to meet demands for sprouts. Seeds are soaked to remove dirt and substances some seeds produce when placed in water.
After washing, soak seeds in clean water. The soak time for seeds varies, but typically 12 hours is the maximum. Soaking seeds increases the seed’s water content and brings it out of its dormant state, allowing germination to happen.
For successful germination, seeds soak in temperatures ranging from 55 to 70°F in a sprouting vessel. Strainers lined with damp cloth work because they allow drainage while moistening the beans.
Sprouting jars are also popular choices, and commercial tiered sprouters allow you to grow multiple sprouts at a time. A vital factor for growing sprouts is breathing and not sitting in water. Proper drainage lets oxygen reach your beans and makes draining excess water easy. Beans rot when left in water.

If sprouts do not grow properly, they are inedible; several factors may cause this. Seeds not being cleaned well or left to sit in water after the first soak are common problems. If seeds dry out before being watered or do not receive enough oxygen, your sprouts may fail to grow.
What to Know about Sprouted Beans
Before sprouting mung beans, your source is crucial to growing sprouts without contamination. When selecting beans, choose whole and untreated beans made for sprouting.
To find these beans, health food stores or online vendors like Sproutpeople.org carry starter sprout kits. Beans sold in packets come treated with chemicals and are unsuitable for sprouting.
Learning how to sprout beans has benefits beyond the almost immediate access to fresh sprouts. A study in the Harvest Health Blog stated that the germination process breaks down the starch in the grain and phytic acid, decreasing the body’s vitamin and mineral intake.
Using grains harvested during the germination process increases the percentage of nutrients present in the grains. Raw mung beans contain over 10% of the daily value for nutrients like potassium, iron, and calcium. When harvested at the sprouting stage, these beans are high in folate, vitamin C and K.
While using sprouted grains over regular grains does not change the nutrients; it alters the quantity. To compare the difference between standard grain products and those that use sprouted grain, note nutrition values on the packaging(.).
Because there is a risk of bacteria growing in your sprouting vessel, we do not recommend eating raw sprouts, especially if you are pregnant or are serving sprouts to young children. After growing bean sprouts, cook them in the microwave or on the stove to prep for your favorite meals while killing bacteria at the same time.
How to Grow Bean Sprouts in a Colander
Growing bean sprouts involves rinsing and soaking mung beans to cause them to sprout. After their initial soak, your beans require more water throughout the process until they are ready to harvest when their taste is to your liking.
Because beans expand when they sprout, select a colander and measure enough beans to fill it halfway. Mung beans are small, similar to the size of green peas, but if you want to sprout chickpeas, a colander works better than a jar.
Fill a container or bowl with cool water to soak your measured beans for up to 12 hours until they sprout. Once your beans sprout, soak a cheesecloth or a thin clean piece of cloth in water before lining it in your colander. Drain your beans and add them to the colander, spreading them out across the wet cloth, so they remain damp.
Dampen your cloth and beans two to three times each day to help the beans continue to sprout. The longer your beans are left to sprout, the longer they grow and the more their taste develops.
The type of bean used determines the length of the sprout. Taste your sprouts to decide whether they are a desirable flavor for you to harvest.
Because sunlight is an essential factor for the growth of your sprouts, it’s relevant to note that mung bean sprouts grow in light or dark environments. Bean sprouts that grow in the dark come out crunchier than those grown in the light; however, these sprouts have less nutritional value. Beans that grow in normal light conditions also develop white sprouts.
To grow sprouts that are thicker and similar to ones found in grocery stores, apply weight to your sprouts in their sprouting vessel. If growing in a jar, fill a small cup with water and place it over your sprouts during the sprouting process. This added weight results in your sprouts growing larger and crunchier.
How to Sprout Beans in a Jar
Wash your beans to clean them and remove any damaged beans. Making a bean sprouter is simple by combining a few everyday household items that make sprouting your beans a straightforward process.
Pour enough beans into your vessel while leaving enough room for your sprouts to expand. Unlike in a colander, there is less space for sprouts in a jar; only use enough bean seeds to fill the bottom half-inch. Mason jars are excellent choices for growing thinner sprouts like alfalfa.
Cut a square of cloth to place over your jar and secure it with a rubber band. Leave your beans in the water for a maximum of 12 hours at room temperature. For other beans, you may only need to soak them for eight hours.
After the first soak, tip them over and letting the excess water drain from the top. An easy way to drain your sprouts without holding the jars over the sink is to set them upside down on a rack or in the dish drainer. Once drained, fill your jar with fresh water and drain again.
Repeat this rinsing process three times a day until your sprouts reach the length you want. The best size for mung beans is around one-half-inch, and mung bean sprouts reach this length about two days after the first soak.
If you plan on growing alfalfa sprouts, the process looks the same, but after soaking in the jar, leave your jar on a sunny windowsill for a few hours. Sunlight turns the small leaves green. After rinsing in a bowl, remove any loose hulls before using your sprouts.
Planting shallots in containers indoors is another possibility for growing veggies inside. You can use a traditional container and soil or regrow shallot scraps in a jar. Jalapenos can be easily grown indoors, as can all kinds of beans, not just sprouts. Grow garlic at home the same way or add it to your garden to ward off a variety of bugs.
Harvesting and Using Your Own Sprouts
After growing your sprouts, give them a final rinse and drain them in a strainer. Pick through your sprouts to toss out any beans that did not sprout. Keep bean sprouts fresh by wrapping them in a damp paper towel and placing them in the fridge.
Your sprouts can remain in a sealed container or plastic bag, damp, for three to five days before they wilt and turn brown.
Unlike some vegetables that do well when frozen for storage, bean sprouts lose their firmness after being frozen unless blanched first. Because bean sprouts are easy to grow, continuously growing small batches keeps a steady supply rather than storing your sprouts.
Although sprouts can be eaten raw, cook your sprouts before eating them to avoid the risk of salmonella and E. coli. Alfalfa sprouts are the exception as their texture turns mushy when heated.
Cooking with bean sprouts is simple because sprouts quickly take on the flavors of ingredients cooked with them. To make a delicious and simple dish with your new sprouts, combine them with a few ingredients and a soy-based sauce.
Combine brown sugar, soy, sesame oil, and salt and pepper to taste in a bowl to create your sauce. Warm peanut oil over medium-high heat until it simmers. Add your garlic until it turns browns, then include green onions until fragrant.
Add your bean sprouts and increase the heat while tossing for one minute. Pour the sauce in and continue cooking for two to three minutes until sprouts are cooked but still crunchy.
Additional Information about Growing Bean Sprouts
Proper storage is crucial for keeping your sprouts until you are ready to cook with them. Excess oxygen from an unsealed container or bag, or direct sunlight, causes sprouts to turn brown faster.
If you leave your sprouts in the fridge too long, they may also begin to change color. Unless your sprouts become slimy or develop an odor, they should be safe to eat, but use your best judgment. Because bean sprouts are so easy to grow, it’s best to start growing a new batch instead of eating a bad bunch from the fridge.
Because sunlight and temperature are two factors you have limited control over outside your home, we suggest only growing sprouts indoors in a controlled environment.
Keeping your sprouts at a steady temperature and away from excess sunlight is the best way to grow sprouts consistently. Fluctuations in temperature may alter the time it takes for sprouts to reach the proper length.
If you are familiar with bean sprouts purchased from the store, the sprouts you grow at home might look slightly different. This change in appearance is likely due to the removal of the bean shells after the sprouting process. To get rid of the hull, run your sprouts underwater until they fall off. The shells are edible but contain little to no flavor.
Whether you’re new to growing vegetables at home or are simply a fan of adding sprouts to your meals, it’s time to start growing bean sprouts. Bean sprouts are the perfect place to start due to the minimal supplies you need and how quickly they grow.

If you learned how to grow bean sprouts, please post this guide on Facebook and Pinterest to share how to sprout beans with your friends and family who want to grow their own food.